Thursday, November 28, 2013

D.I.Y all the time! Mosaic paint chip swirl

D.I.Y all the time!

Mosaic paint chip swirl


So it's Thanksgiving and i am stuck at work until 4. Yay me! :/ Thought it be a perfect time to get another D.I.Y up. Anyone else working today?

The supplies you will need are -5 470A Behr paint chips -5 490B Behr paint chips -5 520A Behr paint chips -5 570A Behr paint chips -Black cardboard poster - Pencil - Glue -Scissors

 Cut the paint chips in all different shapes and sizes.
 Organize the paint chips by color this will help you when starting to glue them on the poster board.
 I drew the swirls on a white board to show how the swirls are drawn on the board. I did this because when i tried to take a picture of the black board it was hard to see the lines I drew. Basically, to draw the swirls begin at the middle of the poster and draw a sharp curved line to the edge of the poster. . Two colors will be going into one swirl making 8 swirls that need to be drawn.
 Begin gluing on the paint chips in an ombre pattern. Start with the lightest color, two colors should be glued in one swirl.
 Should begin to start looking like this, very pointy in the middle and spread out as you glue. Continue the same process until the entire poster board is covered. This does take some time i am not going to lie.


Sunday, November 24, 2013

D.I.Y all the time! Ombre Paint Chip Flowers

D.I.Y all the time! 

Ombre Paint Chip Flowers


 Supplies: -5 470A Behr paint chips - 5 490B Behr paint chips - 5 520B Behr paint chips - 5 570A Behr paint chips - Blank sheet of paper - Pencil  - Scissors - Ruler - Black board *optional

 When at the hardware store picking up the paint chips. Behr has these pedal paint chips available if they are available to you pick one up. If the pedal is not available no problem, it is very easy to make one.
 To make the pedal template first draw a 5 3/4 inch straight line.
 

On the bottom of the line draw half of a circle. With its lowest point being 2 3/4 inches.


At the top of line, begin drawing half a circle that peaks at 1 1/4 inches and comes down in a downward curve until the whole pedal connects.

 Grab all your paint chips.
 Place your pedal template on top of the paint chip with both ends of the pedal on the lightest and darkest color of the paint chip.
Should look like this once all pedals have been cut. (Don't throw away the scraps of the paint chips those can be used for another project.)


Add double sided tape to both ends of the pedal.

 Begin taping on each pedal to form a flower on to the top corner of a wall. Start with the Mint colored paint chip pedals at the top corner to begin ombre effect. Continue with the green pedals, light blue pedals and end with the dark blue pedals.


 Of course adding more flowers is your decision it will just require 5 or more paint chips of each color. Which i might just do the next i go to the hardware store. Ill pick up more paint chips. Does anyone else feel weird taking so many paint chips? I sure do, i try not to be so obvious taking them since it is many of the same colors. Maybe that's just me.


Here are other designs that can be done with the paint chips. With a black cardboard. If you do not want to tape anything on your wall. Just place and glue each pedal to your liking.


Tuesday, November 19, 2013

Saturday, November 16, 2013

D.I.Y all the time! Sea animal "canvas" silhouettes

D.I.Y all the time!

Sea animal "canvas"

silhouettes  


What you are going to need: -2 cereal boxes (family size) - four printed out animals templates -white paint -yellow paint, -orange paint -aqua blue paint -navy blue paint -pencil -glue gun -scissors - push pins -different size paint brushes - ruler   
 * I did not use the Honey Bunches cereal box it was too small. I used a family size box of Lucky Charms.

 Keep your templates no bigger than 8x10 inches or different measurements will have to made to fit each canvas.
*That is why i had to draw the sea hose smaller to fit the 8x10 inch measurements.
Cut out each animal.

To make the canvases cut your cereal box open at ONE END not both. (Cutting from both sides may ruin measurements). Measure your box the big rectangle in the middle is 8x10 inches and the tabs on the sides are 1 in. Draw out four of these outlines.
 Cut out the box outlines and begin bending in the sides following the lines to form the canvas.
 At first i was using tape to stick together the sides but they ended up looking like...
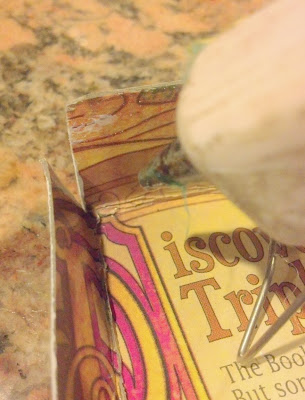
 This it what it looked like when i taped the edges together. Not pretty.
 Glue the edges together.
 Add glue to one side of the tab and attach the corresponding tab.

 Hold corners together until glue dries.

 *The canvases are already painted when i glue the corners because i didn't decided to glue the edges until after i painted the canvases and realized how the corners were not attached.
Paint thin a white layer on each canvas. Let dry for 25 min.


 This is how it looks when all canvases are all painted and dried.

 Place the templates on top of each canvas.

 Trace each animal template to each canvas.
Should look like this once all animals are traced onto each canvas.


 Begin to paint.

 Paint an outline around each animal. Then, cover the canvas.

Once all canvases are painted they should look like this.

 From the extra scraps you cut out grab a piece that is 1x5 in. Paint white.
 Paint an inch width thick of each color.
 Cut out each piece and bend them in half.

 With the glue gun add glue to the bottom end. (Any sides is the bottom.)

 Hold the glued piece to the inside of the canvas. Hold until glue dries. Do to each canvas.
 Really blurry picture, but should look like this once it is glued on.
Hang up the canvases with push pins.


Rainy day that is why both pictures look kind of gloomy.