Sunday, February 16, 2014

D.I.Y all the time! Hanging Candles

D.I.Y all the time! Hanging Candles


Lately things just haven't been going my way. I was working on a D.I.Y outside and a gust of wind blew a plate full of paint all over my keyboard FAIL! I KNOW :/ So my laptop has been acting up for the past week. I tried to post earlier but it was impossible to upload any pictures. Then, when i was able to upload pictures the laptop would shut off on its own. I just got too frustrated to post. So please bare with me. I managed to kind of fix my laptop minus a couple keys that popped off while trying to clean up the paint off under them. Again please bare with me i am now saving up for a new laptop. So now lets get started, you will need:

Floral wire
Glue gun
Tea cup candles
String
Floral
Pliers


Step 1: Cut each floral wire into a 6 inch piece. *Will need two 6 inch pieces per each candle holder.


Step 2: With the pliers bend one end off the wire up. Beginning to form a triangle. Leaving about an inch at the base for the candle.  


 Step 3: Bend the second end of the wire up completing the triangle.

 SHOULD LOOK LIKE THIS

Step 4: Take your pliers and bend the ends of the wire making it into an inward circle. Do to both ends.
For on the second one bend the ends in an outward circle. Do to both ends.

SHOULD LOOK LIKE THIS

Step 4: Glue both wires together at the middle of the bottom.


Step 6: Take a very long piece of string and insert it through each circle.


Step 6: Double know it to insure the ends tdo not come apart. 
Step 7: Tie top ends of string together as well.


Step 8: Hang and light.
DONE!


Tuesday, February 11, 2014

D.I.Y all the time! Underwater Newspaper Rose

D.I.Y all the time! Underwater Newspaper Rose

I saw this newspaper rose made on 100layercake. I thought it was so beautiful and knew I had to make some for my sister wedding as a center piece. Then i thought they would look beautiful submerged under water which would magnify the rose to look even bigger. My only problem was you cannot put newspaper under water without it breaking apart. That's when i found out if you spray clear coat paint onto paper it makes the newspaper a much harder texture that is able to hold up under water. So lets Begin!

Supplies:
Stack of newspaper
Clear coat spray paint
Floral Wire
Glue gun
Mason Jar
Candle
Ribbon
Marbles

Instructions:


Step 1: Cut out peddles. You will need five of each size and one cylinder shape piece of newspaper per rose.
 Step 2: Spray paint all of the peddles. (This part can be hard and messy. Doesn't have to be perfect you will later spray a second coat when the rose is finished which will set the rose). Let dry for an hour. You will then feel a big difference on how the newspaper feels.
 Step 3: Bend and fold the peddles. FOLD down the middle and BEND the ends of the peddle backwards.
 SHOULD LOOK LIKE THIS
 THIS IS THE CYLINDER PIECE FOR THE CENTER OF THE ROSE. NOT REALLY CYLINDER SHAPED BUT THAT WAS ALL I COULD REFER IT TO.
 Step 4: Take the "Cylinder" piece and wrap around the wire until it becomes cone shaped. Then, glue to wire.
 Step 5: Take the smallest peddle add glue to the bottom and glue onto the cone shaped newspaper you previously glued. Continue gluing on the rest of the peddles starting with the smallest peddles and work your way up.
 SHOULD BEGIN TO LOOK LIKE THIS. ONCE YOU GLUE ON ALL THE LAYERS.
 Step 6: Wrap a marble with stem wire. (This will add weight to the rose stopping the rose from floating to the top of the mason jar).

Step 7: Glue ribbon to the top of the mason jar.
Step 8: Fill with water.
Step 9: Add rose to jar. (I found using long tweezers made this process easier).
Step 10: Add the candle.

 DONE!


Sunday, February 9, 2014

D.I.Y all the time! Cake Stand

D.I.Y all the time! Cake Stand


Supplies:
3 Foam board
x acto knife or blade
ruler
marker
glue gun
fabric
food cans (# of cans varies on how tall you want the cake stand)

Instructions:

Step 1: Make your measurements on the foam boards. Biggest board will be 14" the second will be 12" third 9" and fourth 8" in diameter.

 Step 2: Cut out the boards.
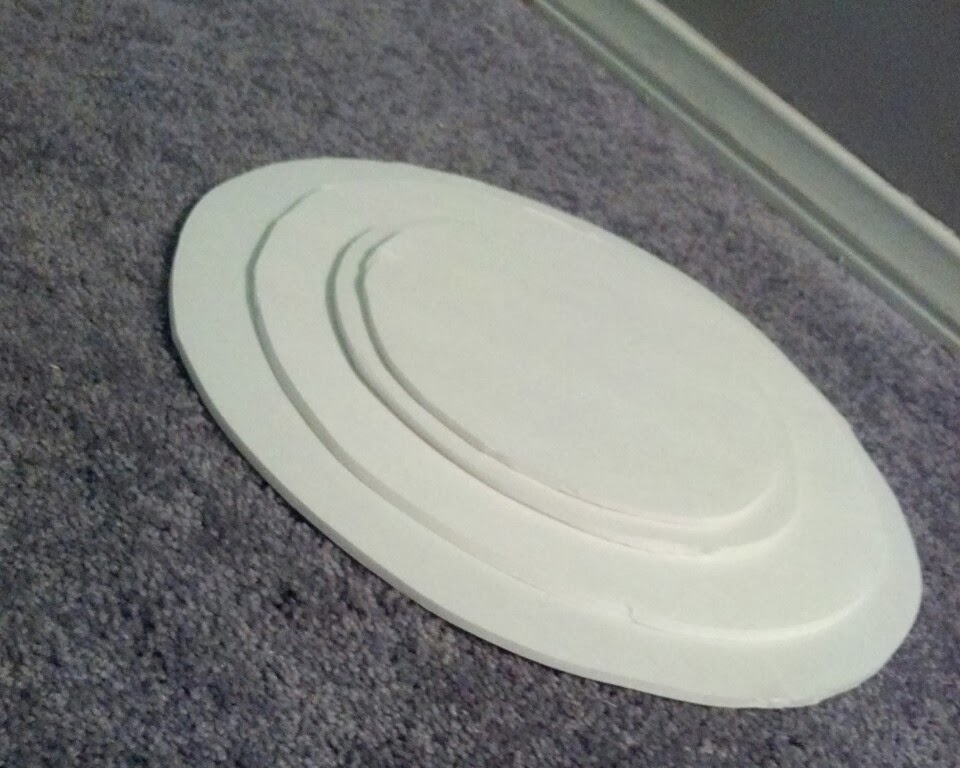
 This is how thin they look doesn't look sturdy at all. So i decided to make two of each size and glue them together.
 Then the boards will look like this. Abit sturdier. I just recently used the cake stand and it held up great.
Step 3: Stack up the cake stand, figure out how tall you want the cake stand to stand. One or two cans in each layer.
 Step 4: If you decide to stack up two cans for more height glue two cans together.
 Step 5: Wrap cans in wrapping paper or just plain white paper. All depends on the color combination for your occasion.
 You should have your boards glued together and the food cans wrapped.
 Step 6: Measure and cut the fabric to each board. Then, glue onto board.
 Step 7: If the bottom of your boards come out not so clean like mine. Cut a circle that fits the board and glue onto the board.
 Lastly, stack up the cake stand and your treats and Done!
Enjoy!

Monday, January 27, 2014

D.I.Y all the time! Phone charger Pocket

D.I.Y all the time!


Phone charger Pocket


Simple way to put your phone away while it is charging. Instead of leaving your phone lying around. Plus it's cute too!

Supplies- ~ Empty/Clean bottle of lotion ~Scissors ~Marker ~Printed Duct tape
 Step 1: Draw an outline of where you are going to cut the bottle. *The wider you cut the bottle from the front the more space you have for your phone.
 This is how the outline of the back of the bottle should look like.
 Step 2: Cut out the outlines. *Place phone inside to measure the fit if you have to make the hole bigger feel free to do so now.
 Step 3: Begin to wrap the duct tape around the bottle.
 Step 4: Cut out all excess tape covering the holes you cut out.
 Step 5: Attach to your phone charger.

DONE!

Wednesday, January 22, 2014

D.I.Y all the time! "Sweetheart Candy" Cookies

D.I.Y all the time! "Sweetheart Candy" Cookies


Perfect cookies to hand out on Valentines Day. Or give to that special someone!
I have an Instagram solely based on my D.I.Ys if you would to follow search d_i_yallthetime

Supplies: ~Sugar cookie dough made from scratch or store bought ~Food Coloring in Purple, Pink, Green, Blue ~Red Frosting ~Heart shaped cookie cut out
 STEP 1: Divide cookie dough into four
 STEP 2: Add a few drops of food coloring into each ball of cookie dough. Not mixing any colors. Then need the dough until it has taken on another color.
 STEP 3: Roll out cookie dough. Using your heart shaped cookie cutter cut out as many cookies as possible. In different sizes *Optional. Bake.
 STEP 4: Let cookies cool. Frost cookies with classic Sweetheart Candy slogans.


DONE


Saturday, January 18, 2014

D.I.Y all the time! Valentines Day Scratchers

D.I.Y all the time!

Supplies:      -Print out template or make your own Valentine's Day card     -Acrylic Paint (your choice of color)      -Dish soap   -White crayon   -Paintbrush.

Ideas:
Above I have three different scratchers.
~ The first one is "Scratch off a heart to reveal a prize" this scratcher has three hearts each one reveals a different prize. Prize 1 Foot Message, prize number 2 back message, prize 3 a surprise gift.
~The second one is "Special Scratcher" make whatever you'd like with that one.
~The third one is "Uncover 3 stars to win a prize" this scratcher has five hearts the have a star and two have a thumbs down.

These are the supplies needed to finish off the scratcher.

Step 1: Heavily color in the hearts that have the prizes with a white crayon.
 
Step 2: Prepare paint, 2 parts Acrylic paint 1 part Dish soap.
 
Step 3: Paint over hearts.
 
  Step 4: Let dry, give to your special someone.